

Creating an AI-powered video ad is no longer just a matter of writing a prompt and generating a video. While today’s AI tools can produce impressive images and footage, turning them into a coherent advertisement requires planning, visual direction, experimentation, and post-production.
Still, GenAI can’t replace the fantasy of a human being, but can support it and enhance the possibilities.
For this reason, I decided to explore this process by creating a 37-second video advertisement using AI-generated images, video clips, voiceover, and music. The project took approximately two weeks, including story development, visual research, asset generation, and editing.
In this article, we break down our AI video production workflow, from the first visual references to the final edit. We also share the tools we tested, the challenges we encountered, and the lessons we learned about producing advertising content with generative AI.
But first, are you curious to see the final result? Here’s the video.
The tool I used for Generation: Flashboards
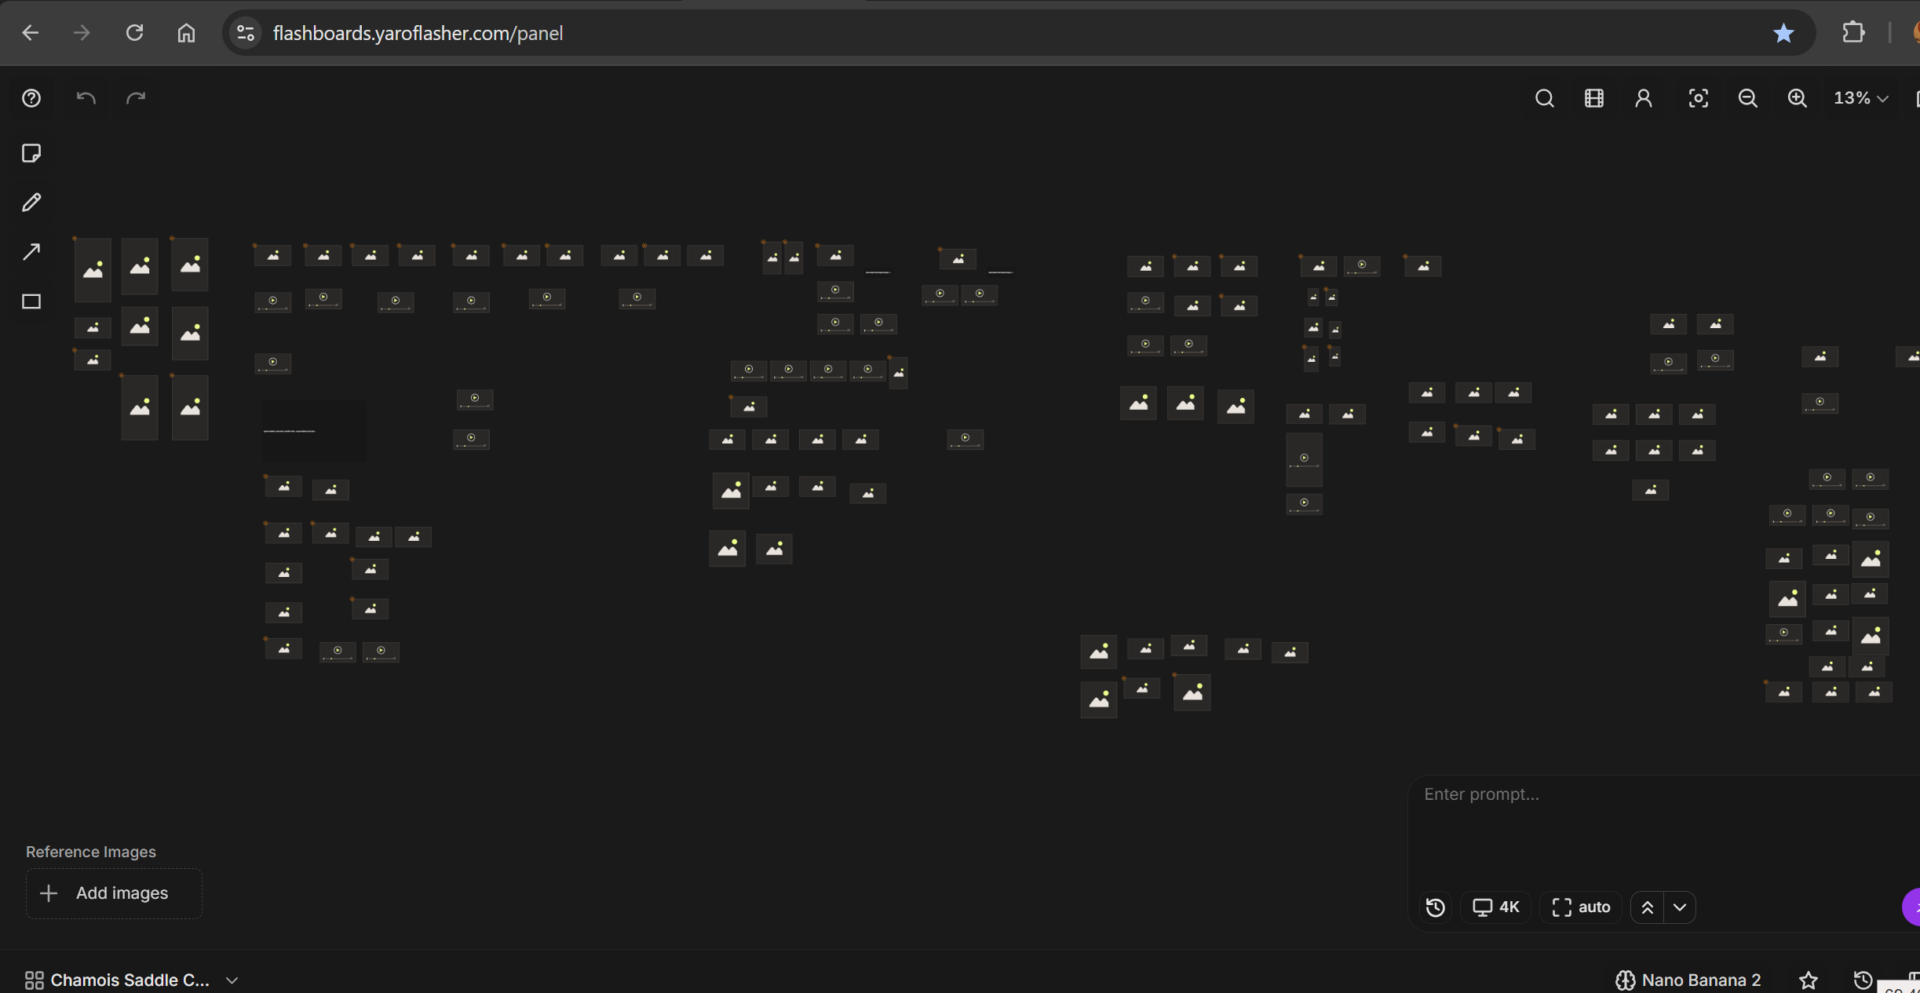
To develop this project, I researched a solution that could give me a good balance between a usable User Interface and a decent amount of APIs calls to the latest GenAI models without breaking my bank account. After some hours I chosen FlashBoards as part of my visual development workflow.
As you can see below, the interface is straightfoward. Everything is a small block, images, audio and videos, which can be referred by the selector on the bottom right of the interface. That’s it, my duty was to find a way to optimize this (probably) opinionated workflow.
The AI Video Ad Production Workflow
In my experience, the process works best when approached as a structured production workflow, where each stage provides the foundation for the next.
For our 37-second advertisement, I followed eight main steps:
- Establish the visual direction with a moodboard. I collected visual references to communicate the desired style, atmosphere, lighting, colours, and composition to the AI models.
- Develop a preliminary storyboard. I broke the narrative into scenes and established the visual progression of the advertisement.
- Create the voiceover and define the timing. I generated the narration and used its pacing to guide scene duration, actions, and editing.
- Create detailed character references. I developed character sheets to help maintain the same appearance across different shots.
- Generate and refine the still images. I created the key visuals for each scene, iterating until the compositions and details matched our creative direction.
- Generate the video clips. I animated the still images, guiding movement between keyframes and testing alternative approaches where needed.
- Generate the background music. I created music that supported the advertisement’s changing tone, from its medieval-inspired opening to its more playful second half.
- Assemble and edited the advertisement. I combined the clips, narration, music, transitions, and compositing into the final video.
After walking through the production process, we’ll examine the lessons learned, compare the AI video models tested, discuss why cinematography knowledge still matters, and break down the time and AI-generation costs involved.
Let’s start by analysing the workflow phases.
1. Establish the Visual Direction with a Moodboard
Before generating any images, I need to translate the creative vision into visual references that AI models can understand and use.
A moodboard is a collection of images that inspires us or helps us decide how an advertisement should look. It is also used as a way to communicate specific artistic directions to the AI models we will use to generate our still images.
For example, we might want to reproduce the colour palette of a particular film, create haliation effect as an Arri camera with anamorphic lens, explore a specific animation style, or achieve a distinctive illustration technique with a particular line quality.
Describing these characteristics in a text prompt alone can be difficult, especially when we have a very precise visual result in mind. Instead, we can search for existing visual material that represents what we want to achieve and use it as a reference during image generation. If needed then, when can ask our prefe
What Should We Look for?
Depending on the project, our moodboard might include:
– Colour palettes: references from films, photographs, or other visual works that convey the colour relationships and atmosphere we want to reproduce.
– Animation and illustration styles: examples that communicate a particular rendering technique, line quality, character design, or degree of stylisation.
– Lighting and atmosphere: images showing the contrast, shadows, highlights, and lighting conditions we want to achieve.
– Environments and composition: references that help define the look of the locations, backgrounds, and framing.
The objective is to collect references that communicate concrete visual characteristics, rather than relying on broad descriptions such as cinematic, stylised or high quality.
Good places to start are unsplash.com, pixabay.com, flickr.com for photos and moods. shots.net and adsoftheworld.com for successful ads reference. film-grab.com for cinema pro colors.
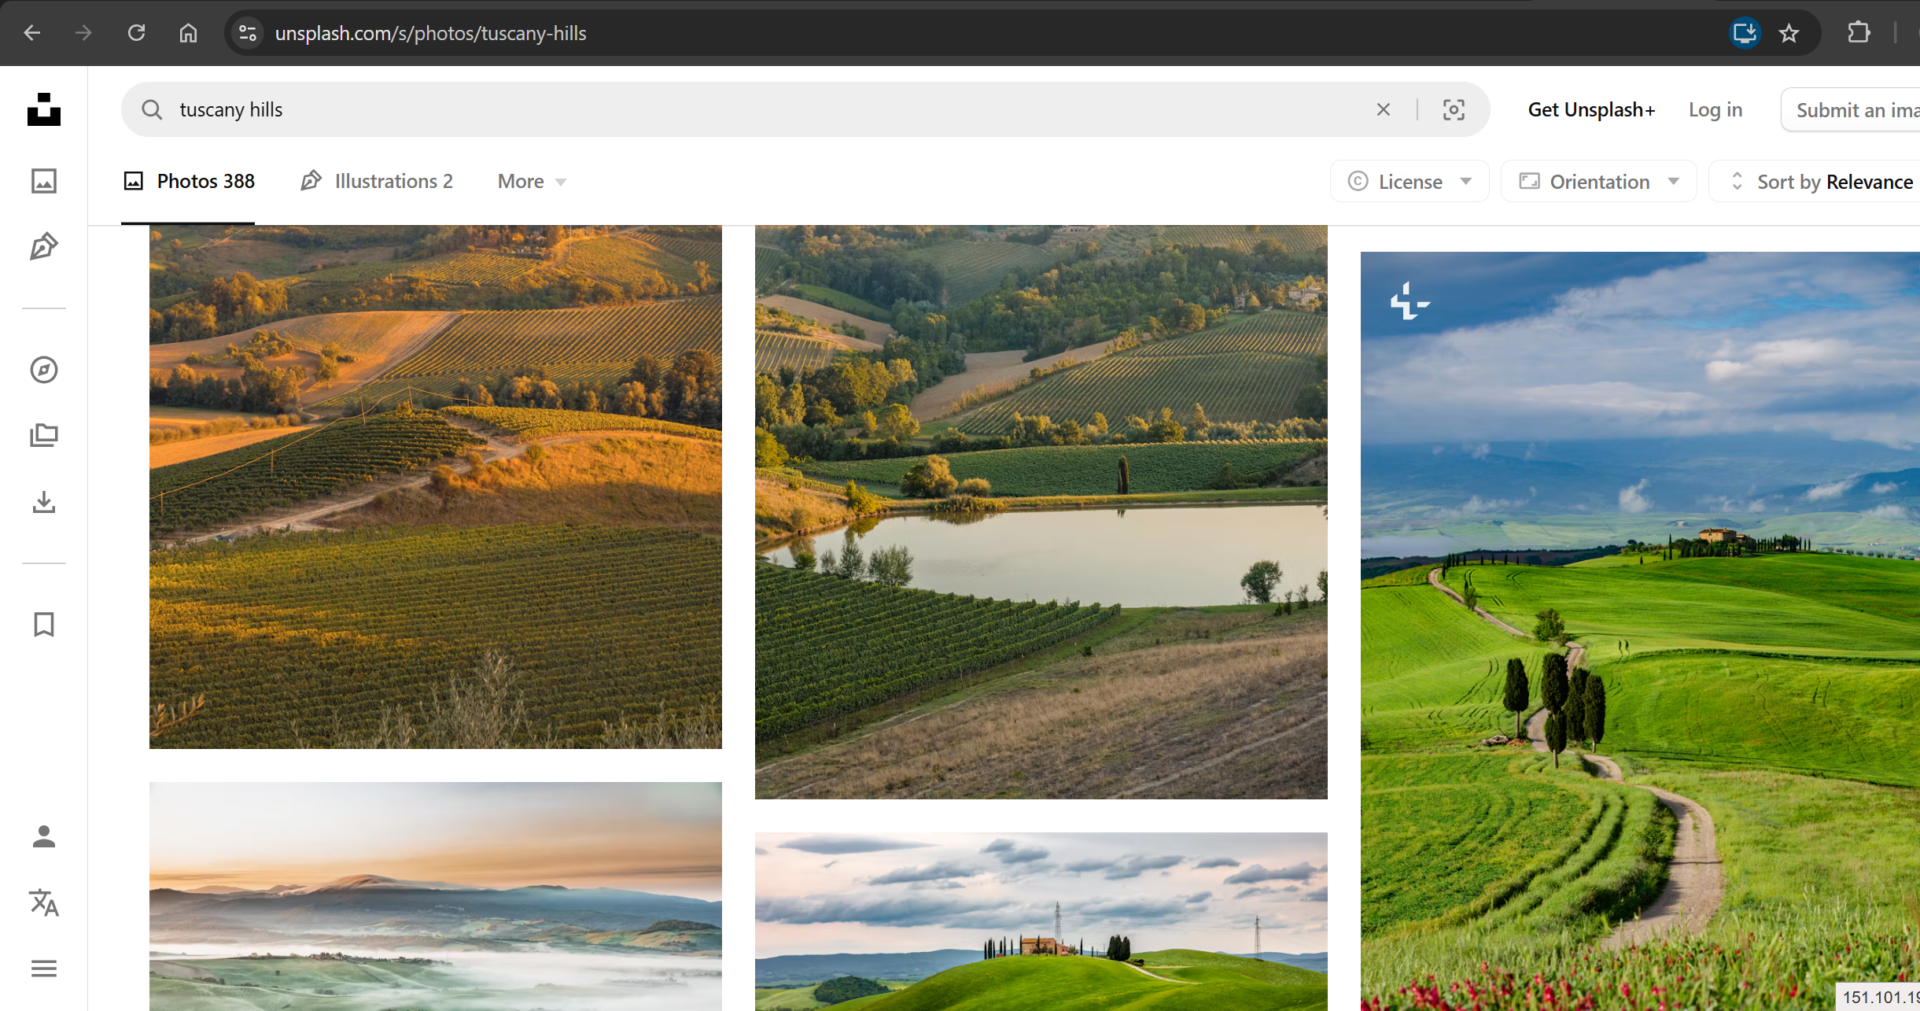
Using the Moodboard as Input for AI Image Generation
Once the references are ready, we can provide them to the AI models alongside our prompts when generating the still images for each scene.
These visual references help bridge the gap between what we imagine and what the model interprets. Instead of asking a model to guess what we mean by a particular artistic style, we give it examples that demonstrate the intended result.
This does not guarantee an exact reproduction. Different models interpret references differently, and some may struggle to preserve specific stylistic characteristics. However, carefully selected visual examples give us a more concrete starting point and make the generation process easier to direct.
2. Create Detailed Character References
With the moodboard giving me ideas, I moved on to character development.
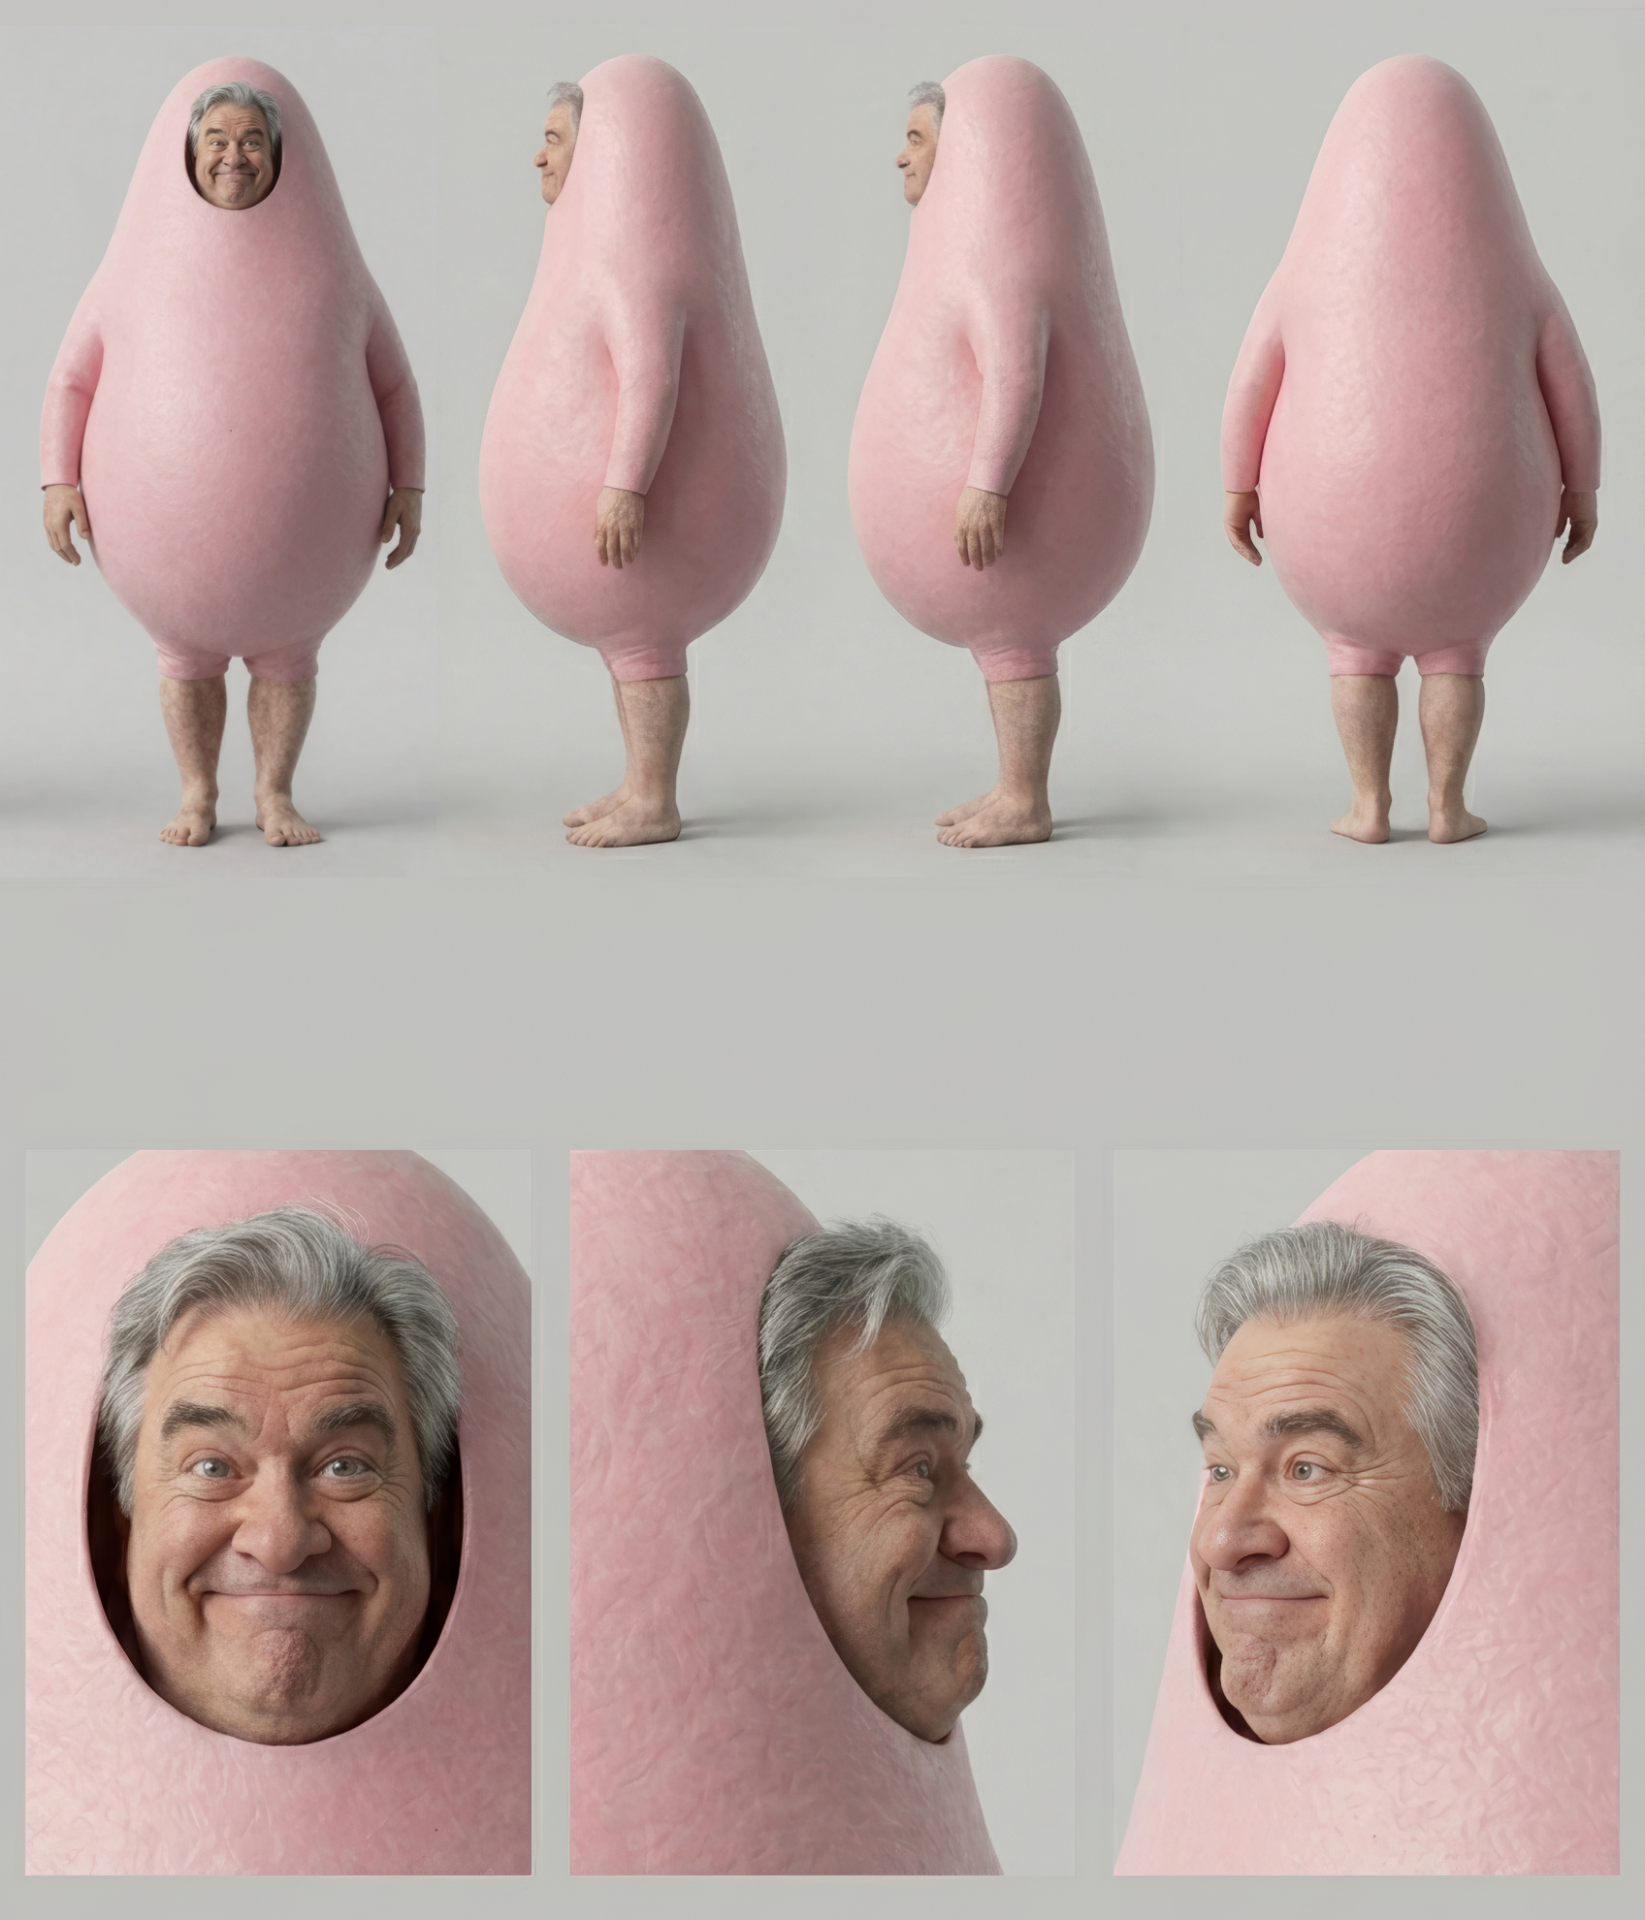
Rather than relying on a short textual description, I prepared visual references that defined the character’s appearance from multiple angles.
A useful character reference sheet can include:
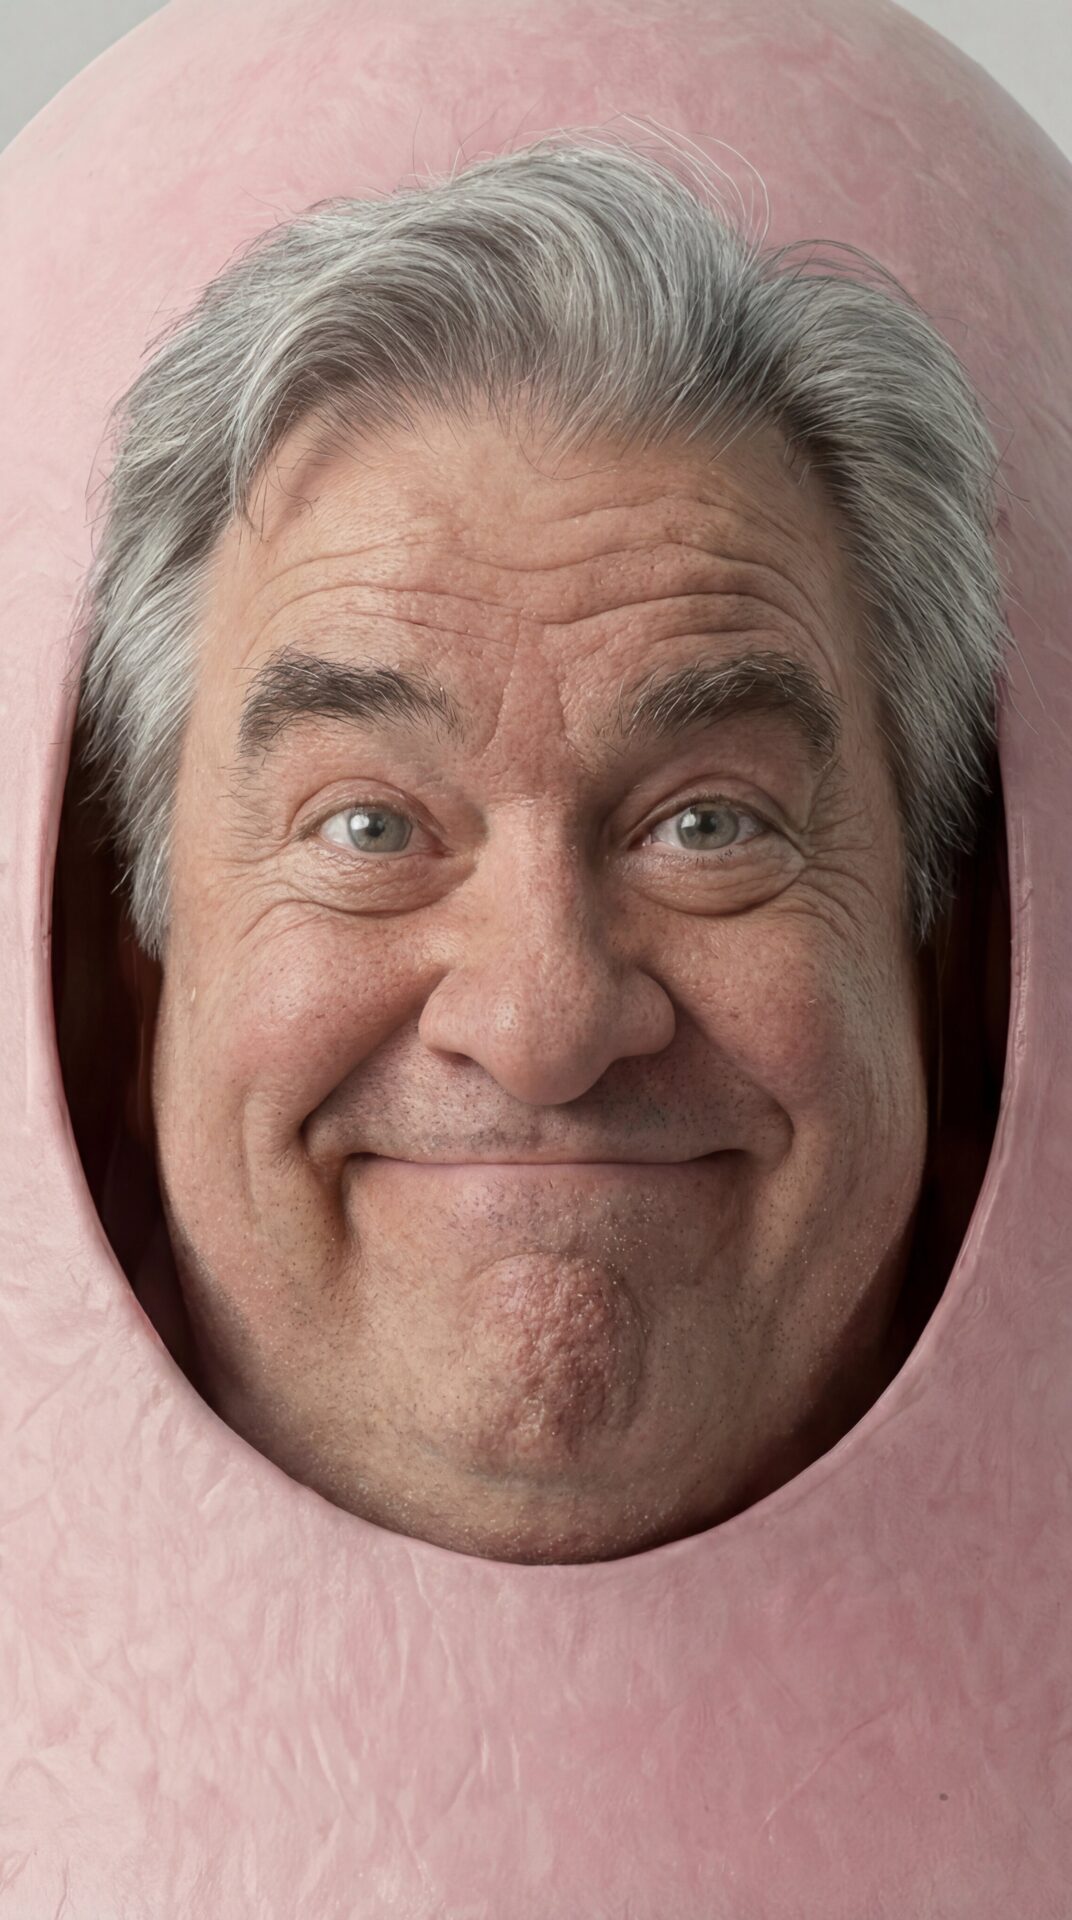
– A detailed facial reference.
– A full-body front view.
– A side profile.
– A rear view.
– Distinctive clothing, accessories, and physical details.
These references provide a stronger visual foundation for subsequent image and video generation. They do not guarantee perfect consistency, but they help reduce ambiguity.
An example of a reference for one of the characters below:
3. Develop a Preliminary Storyboard
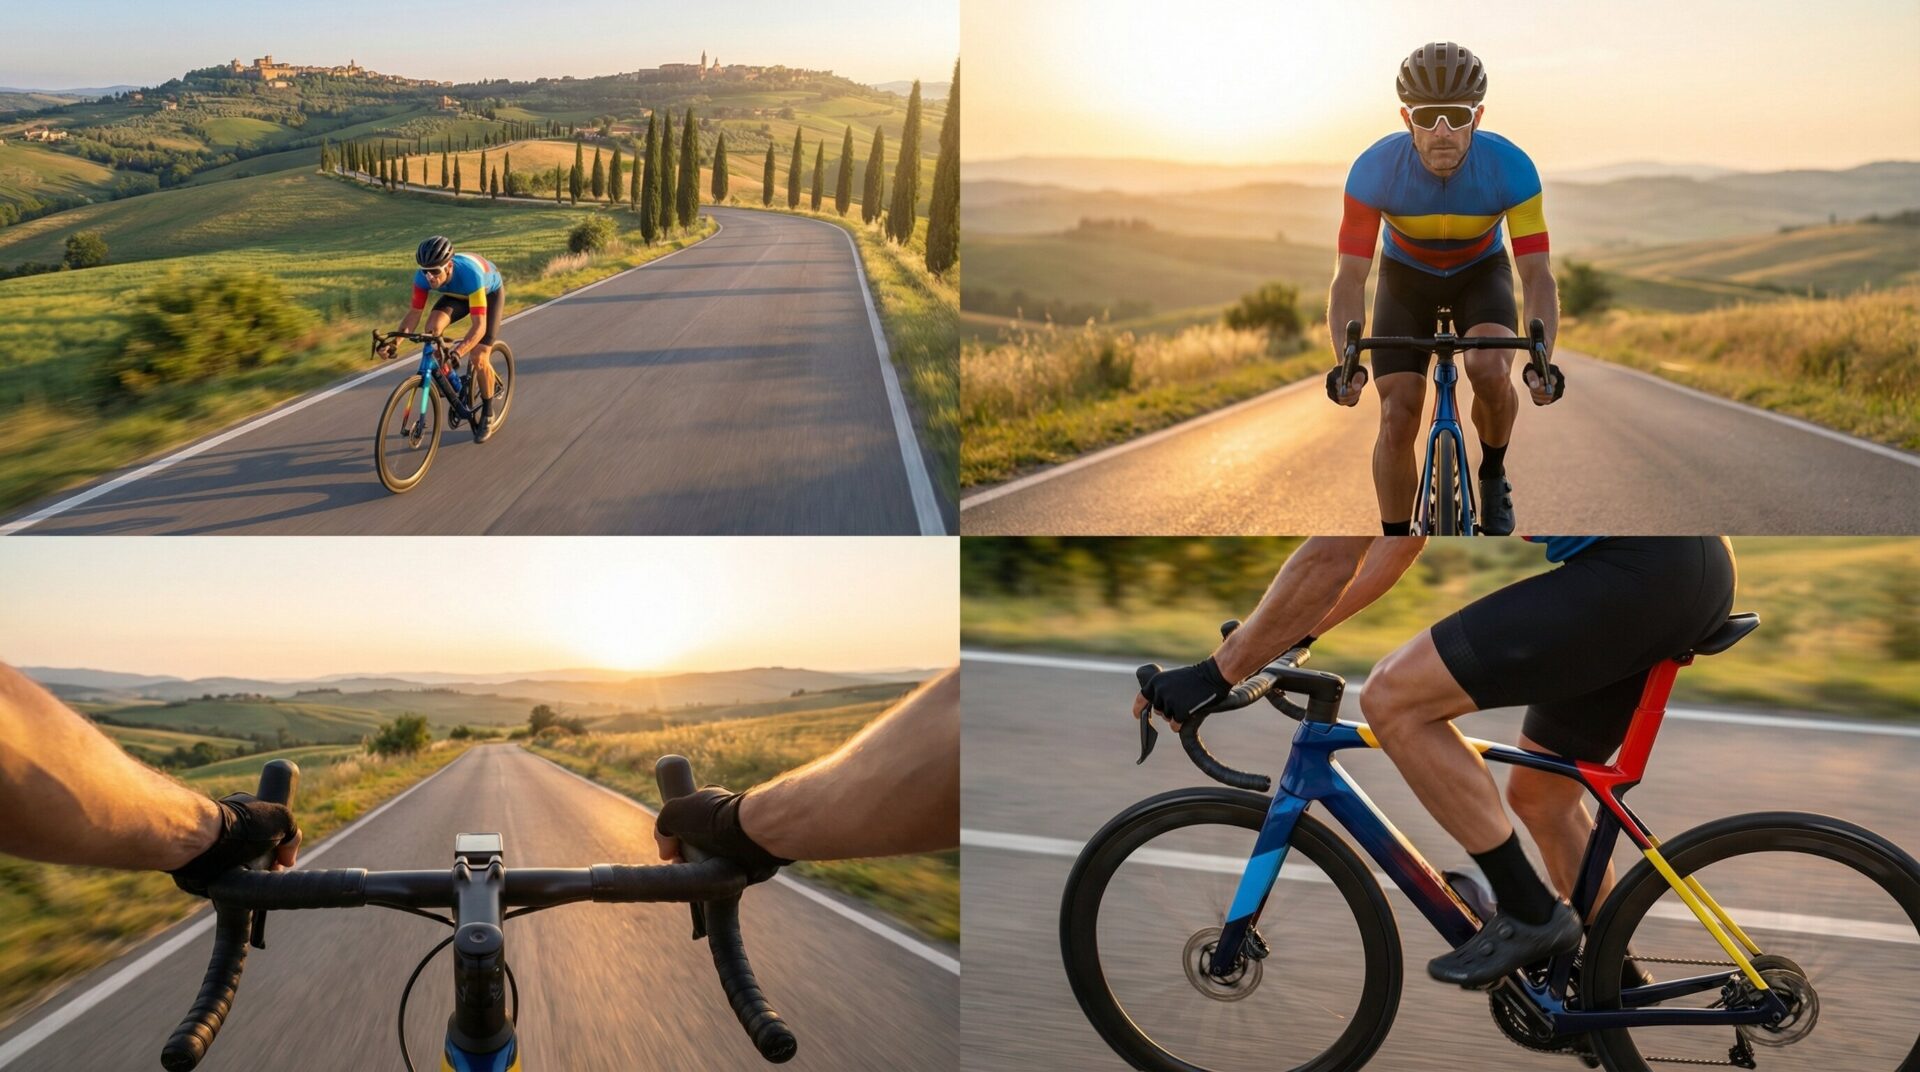
Once the visual direction was established, I created a preliminary storyboard to understand how the story would unfold.
At this stage, the focus was on narrative structure rather than image quality. I needed to understand the sequence of events, the purpose of each scene, and how the advertisement would communicate its message from beginning to end. Also, here
A storyboard helps answer practical questions before investing time in detailed generation.
Does the story make sense? Does every scene contribute to the narrative? Is there enough time for the viewer to understand what is happening? Can one shot transition naturally into the next? In which way should a scene change into another?
These questions are particularly important when working with AI because every additional scene introduces new opportunities for inconsistencies and unexpected results.
My storyboard was a working version rather than a rigid plan. It evolved as I discovered what the models could achieve and which creative ideas translated well into actual footage (be ready to be stupified by what the machine is giving you and to adapt by consequence).
Below the first seconds of the commercial, seen into the storyboard:
4. Create the Voiceover and Define the Timing
Once the preliminary storyboard is in place, the next step can be to develop the voiceover idea. In my workflow, the narration is one of the elements that determines how the entire advertisement will be structured. Hence the need to plan it exactly at this point. It was lately generated using Elevenlabs in house models, the best in the market.
Generating the narration before producing the final video clips helps us make more informed creative decisions.
– Scene duration: the voiceover helps us estimate how much time we can allocate to each part of the story.
– Action timing: character movements and visual events can be planned around the narration rather than fitted into arbitrary clip durations.
– Editing rhythm: pauses, changes in tone, and sentence endings provide useful reference points for cuts and transitions.
– Story clarity: listening to the narration helps us identify passages that feel too rushed, too long, or disconnected from the visual sequence.
The voiceover also provides a practical reference when choosing the start and end frames for each generated clip. If a particular action needs to happen while a sentence is being delivered, we can plan the corresponding visual sequence around that interval.
5. Generate and Refine the Still Images
With the moodboard, storyboard, voiceover, and character references ready, I began generating the still images for each scene.
I experimented with ImageGPT 2.5, Nano Banana Pro and Nano Banana 2, generating multiple variations and refining the results until we found images that matched our creative direction.
This was an iterative process. The first generation was rarely the final choice.
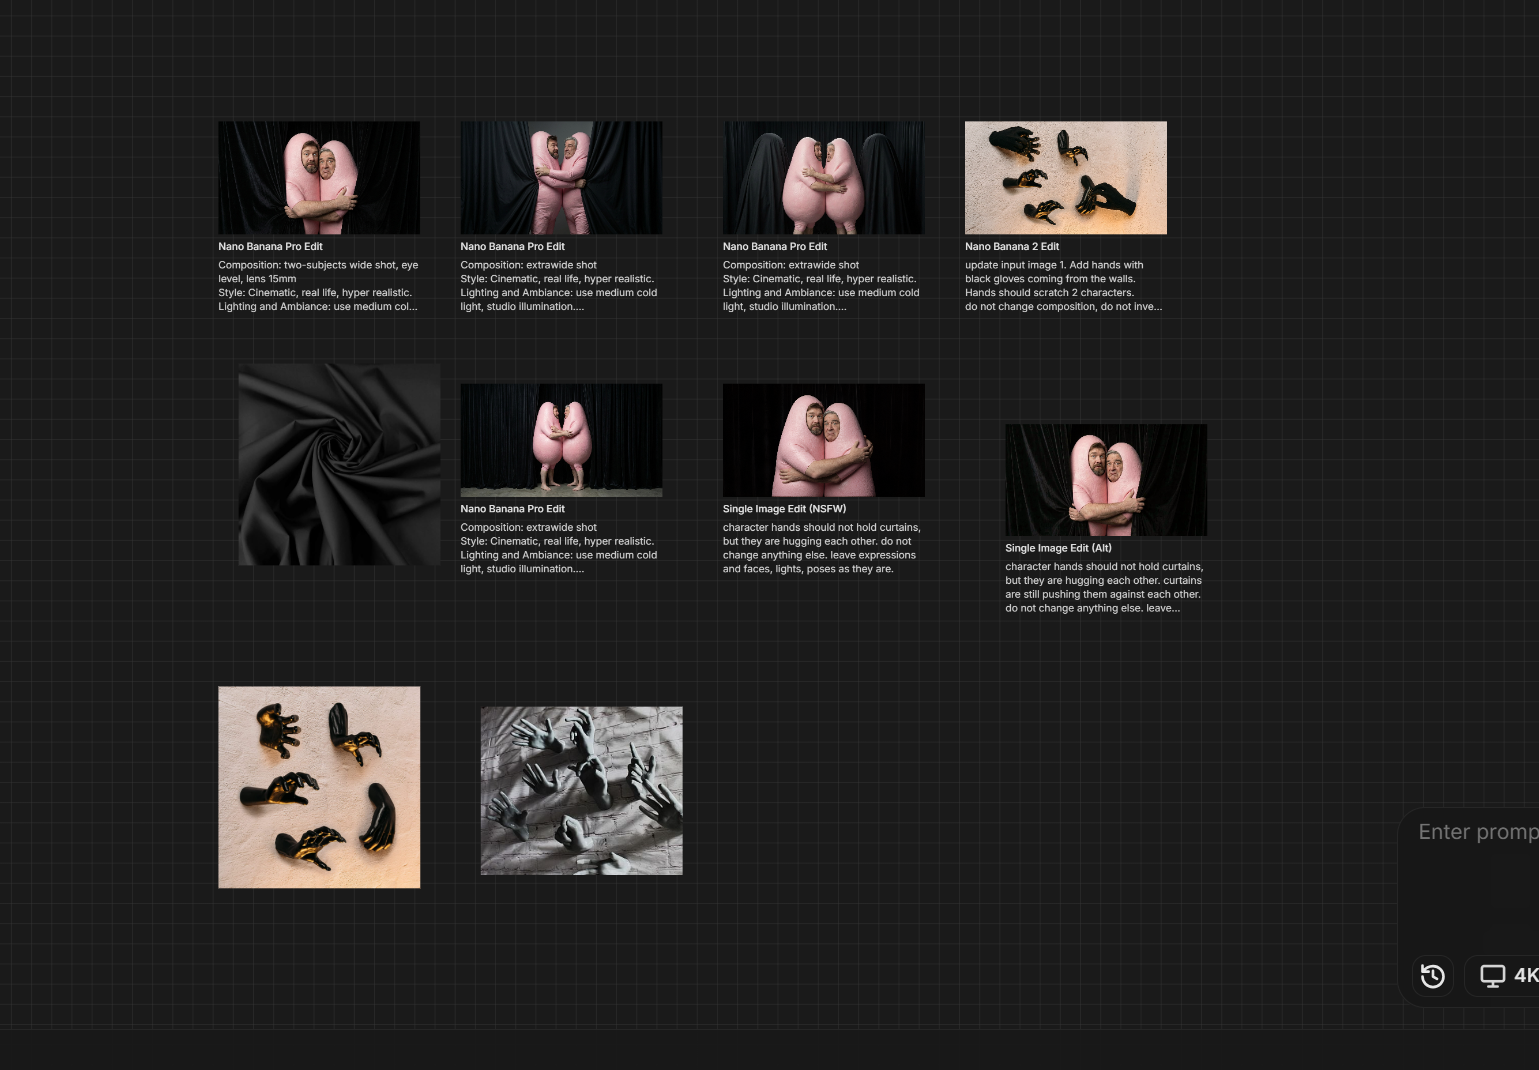
A still image might look good at first glance but contain details that become problematic during animation: a character’s face may differ from the reference, an object may have the wrong shape, or the composition may not support the intended movement.
The image needs to work for the intended movement, not just look good as a picture.
Why I Upscaled Every Still Image to 4K
I upscaled all our still images to 4K before using them as references for video generation, even though the final video clips were generated at 1080p (for this experiment, at least; generating videos at 4k would give us more headroom to work with, but it is quite expensive).
This decision came from an important observation: the quality of the source image has a direct influence on the quality of the resulting video. GenAI algorithms tend to invent details if too much margin is given. If the character is poorly defined, the video model starts with an already compromised reference and try to fix the problems its way. If the face is inconsistent, the animation may amplify those differences. If an important object contains incorrect details, motion generation will not necessarily fix them.
Upscaling cannot reliably recover details that were never present in the original image. However, it can help prepare the source material for the next stage.
The important principle is that image quality is not an isolated concern but an input to every subsequent stage of production.
6. Generate the Video Clips Using Start and End Frames
Once the still images were ready, we moved on to video generation.
For most scenes, we used models that support start-frame and end-frame control, like Kling 3.0, MiniMax H3, Gemini Omni and Veo 3.1 fast. This allowed us to provide a specific starting image and ending image for a clip, leaving the model to generate the movement between them.
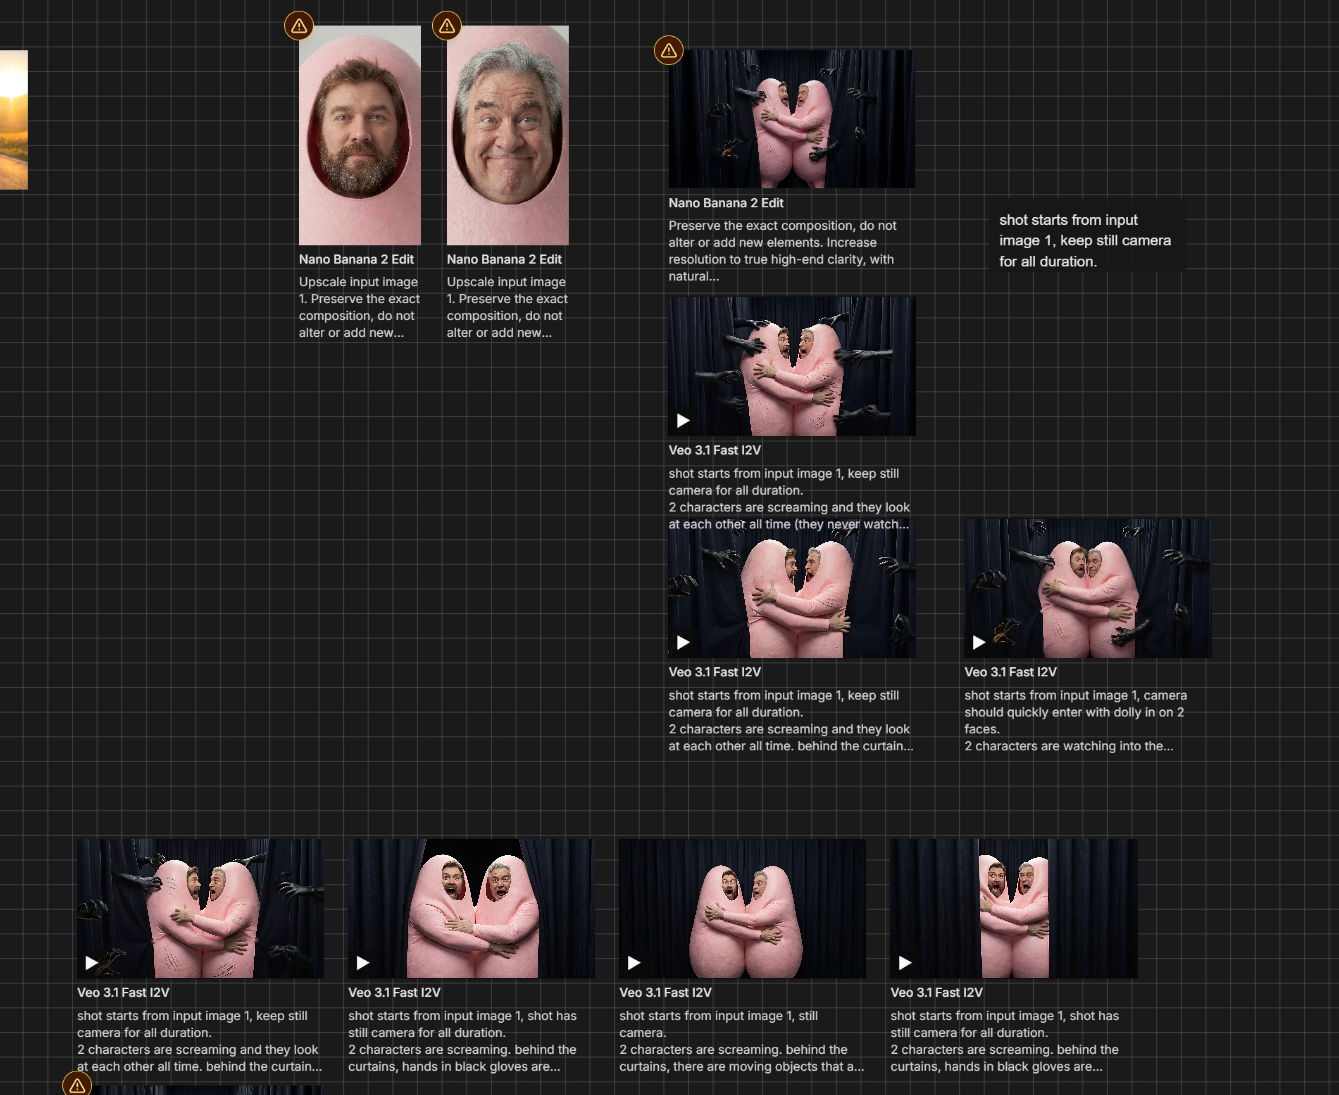
This approach gave us greater control over the intended visual outcome.
Instead of asking a model to invent an entire sequence from a textual description, we could define two important visual states and use them as the endpoints of the animation.
The technique was particularly useful when we needed to preserve a specific composition, character appearance, or final pose.
It also helped us plan the edit in advance. The still images were not merely references: they were designed to become the starting or ending points of individual clips and scene segments.
However, start and end frames do not guarantee a perfect transition. The model still has to interpret the action between the two images, and it may introduce unwanted movements, distortions, or changes in small details.
When We Generated Videos Without Fixed Endpoints
For a few scenes, we took a different approach. We provided image references without explicitly defining both the starting and ending frames, then generated multiple variations to discover which result looked most convincing.
This offered greater creative freedom and sometimes produced more natural movement. The trade-off was less precise control over what happened during the shot.
We learned that the best approach depends on the scene. When composition and continuity are critical, defining both endpoints can be useful. When we want to explore movement or discover an unexpected but appealing result, a more open generation process can be worth testing.
7. Generate the Background Music
Music plays an important role in shaping the atmosphere of an advertisement. It helps establish the tone, reinforces the narrative, and makes transitions between different parts of the story feel more natural.
For my project, I generated the background music using Suno AI V5, providing instructions about the style and mood we wanted rather than composing the tracks manually.
The creative direction came from the story itself. The first part of the advertisement features a voiceover written in a deliberately old-fashioned, almost medieval style. The narrator tells the story of a knight riding his mechanical horse — a humorous way of referring to his bicycle.
To reinforce this playful medieval setting, I wanted the music to evoke the atmosphere of the period. I therefore asked Suno to generate a track featuring the harpsichord as its main instrument, helping establish a connection between the narration and the visual world of the advertisement.
For the second half, I took a different approach. As the narrative shifts towards a more playful and humorous tone, I generated a livelier background track with musical elements that would support the comedy.
8. Assemble and Refine the Advertisement in DaVinci Resolve
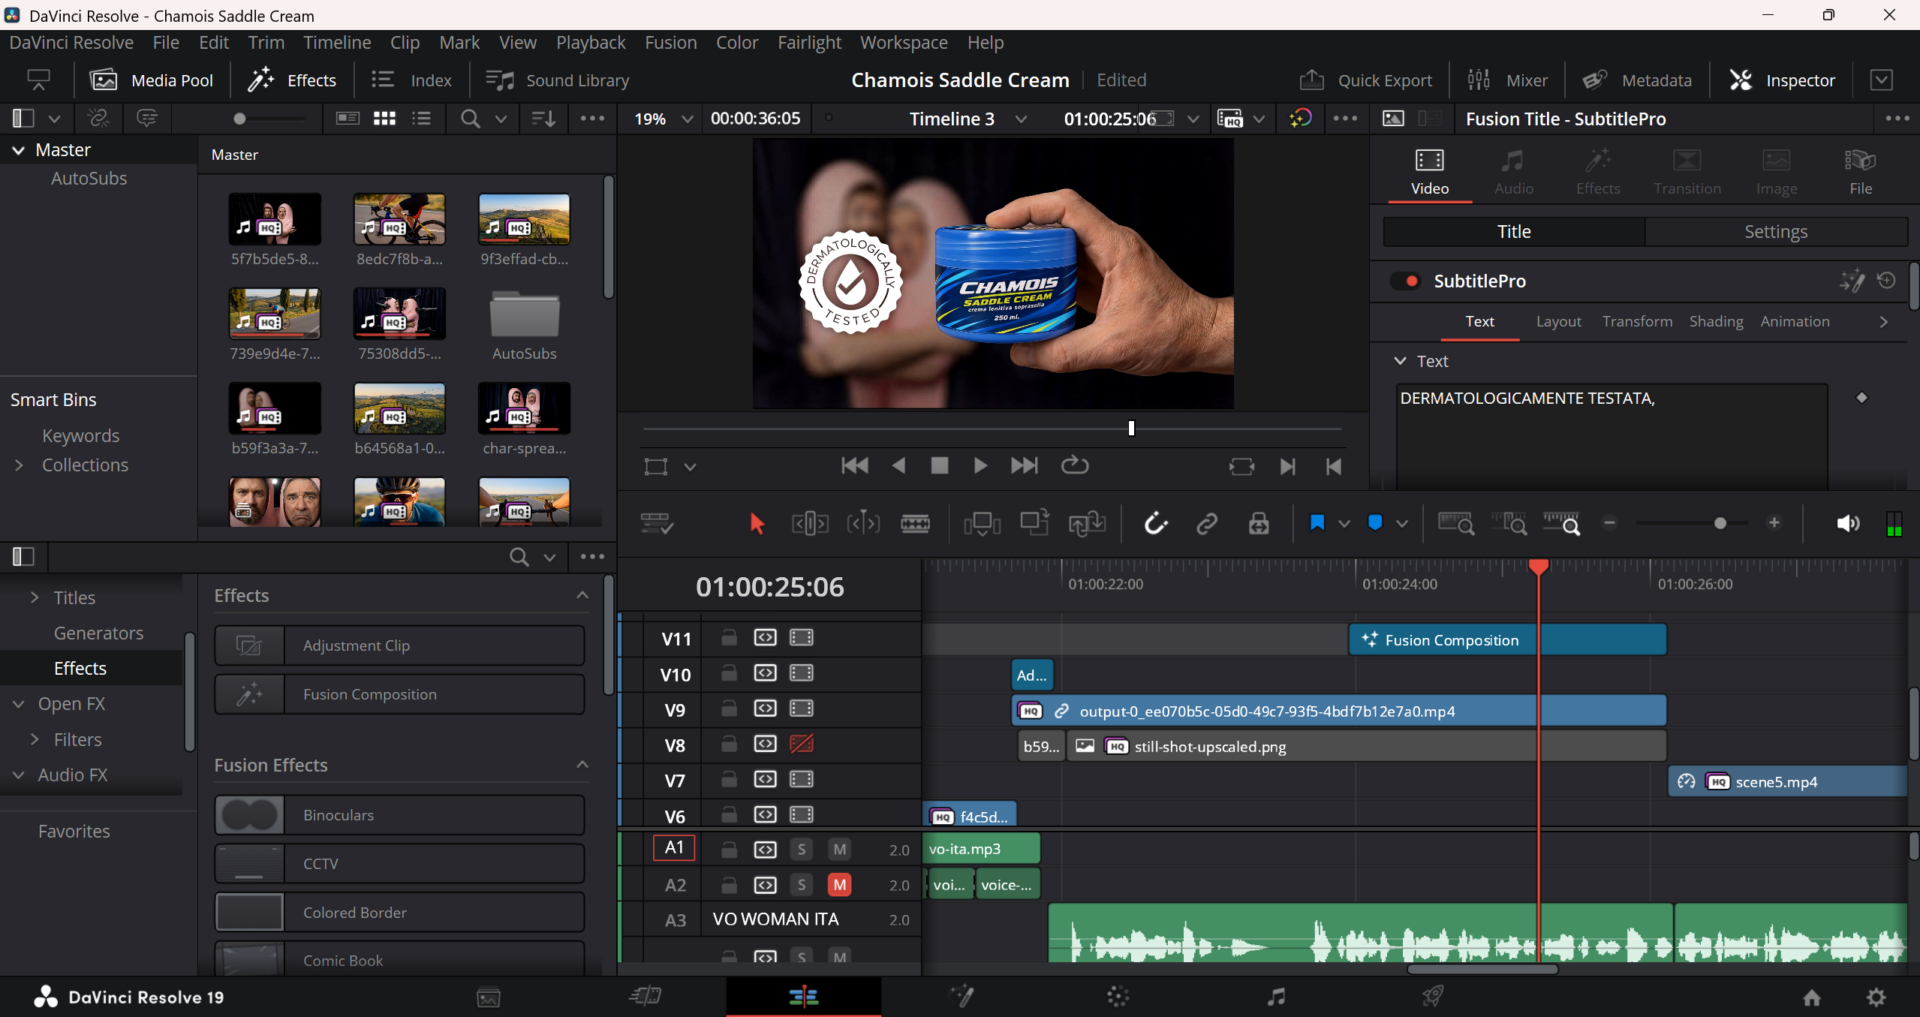
After generating the video clips and music, I assembled the advertisement in DaVinci Resolve and performed additional compositing.
This stage brought the individual outputs together into a coherent sequence.
Even when every clip looks good on its own, the complete video may still feel artificial if the shots do not work together. Differences in pacing, colors, movement, lighting, and framing can become much more apparent when one scene cuts to the next.
Editing is therefore more than arranging generated clips on a timeline. It determines what the viewer sees, for how long, and in what order.
9. Why Cinematography Knowledge Still Matters
Throughout the process, we frequently used ChatGPT Luna 6 and Sol 5.6 to help develop and refine prompts for the different models.
This was useful because writing an effective video prompt involves more than describing what should happen. We also need to communicate how the shot should look and how the camera should behave.
Consider the difference between these two instructions:
“The cyclist looks towards the camera.”
“The camera holds a medium close-up as the cyclist slowly turns his head towards the lens, with shallow depth of field and the background remaining softly blurred.”
The second instruction gives the model a more precise visual objective.
This is where a basic understanding of cinematography becomes valuable. Concepts such as focal length, depth of field, focus, framing, shot size, camera and lens types and camera movement help translate a creative idea into more precise instructions.
We do not need to become professional cinematographers before experimenting with AI video generation. However, without some familiarity with these concepts, directing the model can quickly become frustrating.
A tracking shot, a slow push-in, a pan, and a static shot all communicate different things. They also create different technical demands for the model.
AI assistants can help formulate prompts, but they cannot replace our ability to recognise what makes a shot visually coherent. The more we understand the language of filmmaking, the more deliberately we can direct the technology.
10. The Most Important Lesson: Quality Is Built Upstream
Looking back at the entire process, one principle stands out: the quality of an AI-generated video depends heavily on the decisions made before the video is generated.
If the moodboard establishes an unclear visual direction, that uncertainty carries into the images. If the character references are inconsistent, those inconsistencies can propagate into the scenes. If the still images are poor, the video models inherit those problems.
The process behaves like a chain, with every stage depending on the quality of the previous one.
A powerful video model cannot reliably compensate for every mistake made earlier. Generating more variations may occasionally produce a lucky result, but it is an inefficient way to solve a structural problem.
This is why we recommend investing time in the moodboard, storyboard, character references, and still images before spending significant resources on video generation.
The goal is to give every subsequent stage better material to work with.
11. How Much Does It Cost to Create an AI Video Ad?
Our 37 seconds long project took around two weeks of work (80 hours) to be completed, including the initial story development, visual research, character design, image generation, video generation, iterations, editing, and compositing.
Our AI generation costs were approximately $50. The $50 figure refers to AI usage, not the full economic cost of producing the advertisement. It does not account for the time invested, the value of the skills and previous researches involved, or any other production expenses. Also, keep in mind I used mid-level models and generated at 1080p, when a professional spot requires 4k videos where every generation costs about 1.3$/second.
AI can reduce certain production barriers, but a convincing result still requires planning, experimentation, evaluation, and post-production. The time spent deciding what to generate, assessing the results, reiterating throughout bad results and correcting small unwanted details remains a significant part of the work.
The economics are promising, but the right comparison is not simply the cost of AI credits versus the cost of a finished commercial. It is the total effort required to achieve the desired creative quality.
Conclusion: AI Video Generation Is a Production Process, Not a Magic Button
Creating an AI-powered video ad has changed how I think about the relationship between creative direction and technology.
The tools make it possible to explore visual ideas and generate footage that would previously have required a more traditional production setup and thousands of dollars. However, they also introduce a new set of skills that needs to be developed and constant researches over last models and their costs and capabilities.
Our biggest takeaway is that AI does not eliminate the need for a production process. It makes having one even more important.
For businesses, this is revolutionary. It allows to rethink how visual content can be planned, tested, and produced using new tools, while keeping creative decisions and quality control in human hands. Also, it enhance storytellers to create with less struggle.
Autore
Matteo Lazzarin
A full-stack developer and entrepreneur from Treviso, Italy. He started playing with MS-DOS and Gorillas at the age of four and never stopped trying to understand what was happening behind the screen. After earning a diploma and a degree in Computer Science, he worked with digital marketing companies, designing architectures and developing enterprise web projects, automation systems and custom software solutions for companies of all sizes, including UniCredit, Vodafone, Venice Airports and Eden Viaggi. Today, he is building his own innovation studio, Up In Future, where he explores how to improve businesses and enhance the human experience at work. He loves to learn and share. He also has a second life as a music nerd and wannabe composer.